Active Directory Federation Services (AD FS) Integration
1. Download Metadata from AD FS and iLMS.
AD FS metadata can be downloaded from a specific URL such as the example below:
iLMS metadata can be downloaded from the Service Provider section of the SSO: SAML form found under the Settings Tab.

2. Upload AD FS Metadata to iLMS
Once the metadata files have been obtained for both sides, upload the XML file obtained from AD FS to the Identity provider section of the iLMS settings.
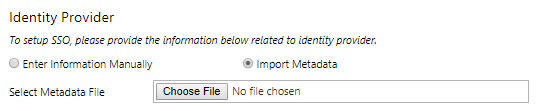
After Uploading Metadata is complete, and the change has been saved, the "Enable Single Sign-on using SAML (v2.0)" box can be checked.
3. Create Relying Party Trust in AD FS
In AD FS we then need to create a Relying Party Trust, uploading the Metadata file previously downloaded from iLMS when the option is presented. Pretty much all of the settings for the relying party trust will be default unless there is another preference.
We do want to create Claims Rule at the end of setting up the trust.
4. Setup the Claims Rule
For the Claims rule, we want to use Email Address (or another identifier) from the dropdown and map it to Name ID
(This is the name AD FS will use for the unique identifier in the SAML token, and the name iLMS will expect).
Apply and Save Changes.
5. Modify endpoint in Relying Party Trust Properties to include binding
- Right-click the Relying Party Trust we created earlier in AD FS and go to Properties.
- Navigate to the End Point tab, and append a binding (Required by AD FS) to the end of the existing URL.
Examples below:- Example of Original Endpoint URL: https://www.inspiredlms.com/saml/consumer.aspx?on=mycompany
- Binding to Append:&binding=urn:oasis:names:tc:SAML:2.0:bindings:HTTP-POST
- Example of End Result with Binding added:https://www.inspiredlms.com/saml/consumer.aspx?on=mycompany&binding=urn:oasis:names:tc:SAML:2.0:bindings:HTTP-POST
- Example of Original Endpoint URL:
6. After Setup Testing
The SSO connection can be tested with either our SP initiated link (Found in the Service Provider Section of iLMS SSO: SAML Settings)
Looks like this: https://www.inspiredlms.com/saml/consumer.aspx?on=mycompany (The binding won't be required here)
or you can utilize your IDP-initiated link.
You will likely be prompted to input your credentials the first time out when testing.
If you encounter an error on the Microsoft login page, then there may be an issue with your credentials.
If you reach an error page on iLMS, it will most likely provide an error indicating the issue with your SAML token. This will also produce a log sent to the email address specified in SAML settings in the iLMS with the full SAML assertion received by the iLMS.
Learn more about this feature here: iLMS SSO: Single Sign-On Setup with SAML
Post-Setup:
Recommended Step if using LDAP Active Directory Sync for Provisioning Users
For the most seamless integration it is recommended to provision users with our LDAP connector's active directory sync and authenticate users with SSO: SAML.
Learn more about LDAP Active Directory Sync here: iLMS LDAP Connector: About the Connector and Setup
If using these systems in tandem it is important to ensure that users created during the AD sync will be given the correct URL for accessing iLMS in all email notifications.
Once Single SignOn has been enabled for your organization you have the ability to select which Login URL learners will receive once provisioned by the LDAP connector.
To view this setting, navigate to the Settings Tab and select "LDAP Connector".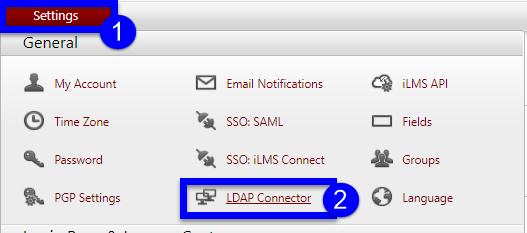
Navigate to the Settings Sub-Tab.
From there select "SAML Enpoint URL" and click Save.
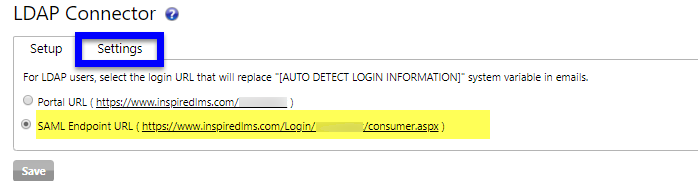
This, enables the use of "SAML Endpoint URL" in place of traditional login portal in iLMS Email Notifications for users provisioned via the LDAP connector.
