PhishProof now offers the ability to clone System Templates and Education landing pages, customize them, and save them as “My Templates”.
Customize Templates
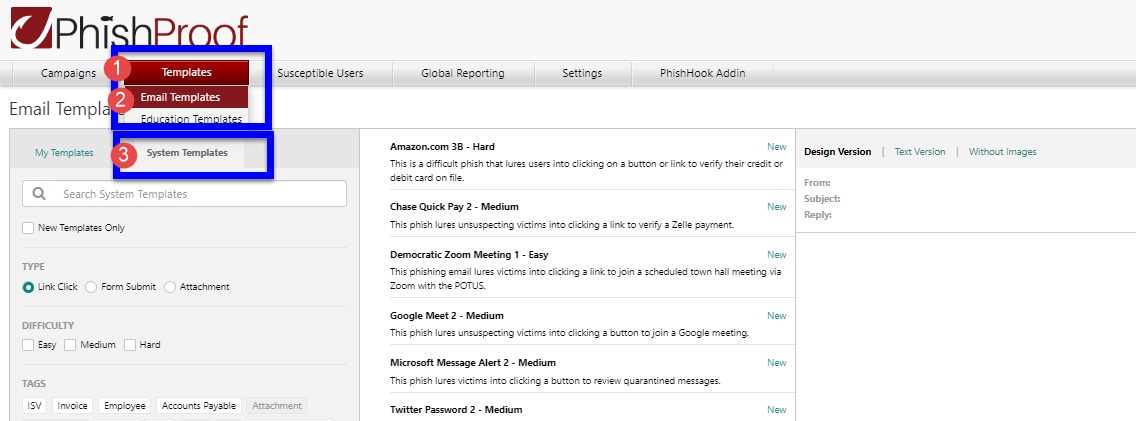
Templates -> Email Templates -> System Templates
Navigate to the (1) Templates main tab and select (2) Email Templates. Once you have saved customized templates, they will be displayed in the My Templates sub-tab.
To start, click on the (3) System Templates sub-tab. Use the search and filter options to locate a template. You can preview any template by clicking on the template name in the center column.
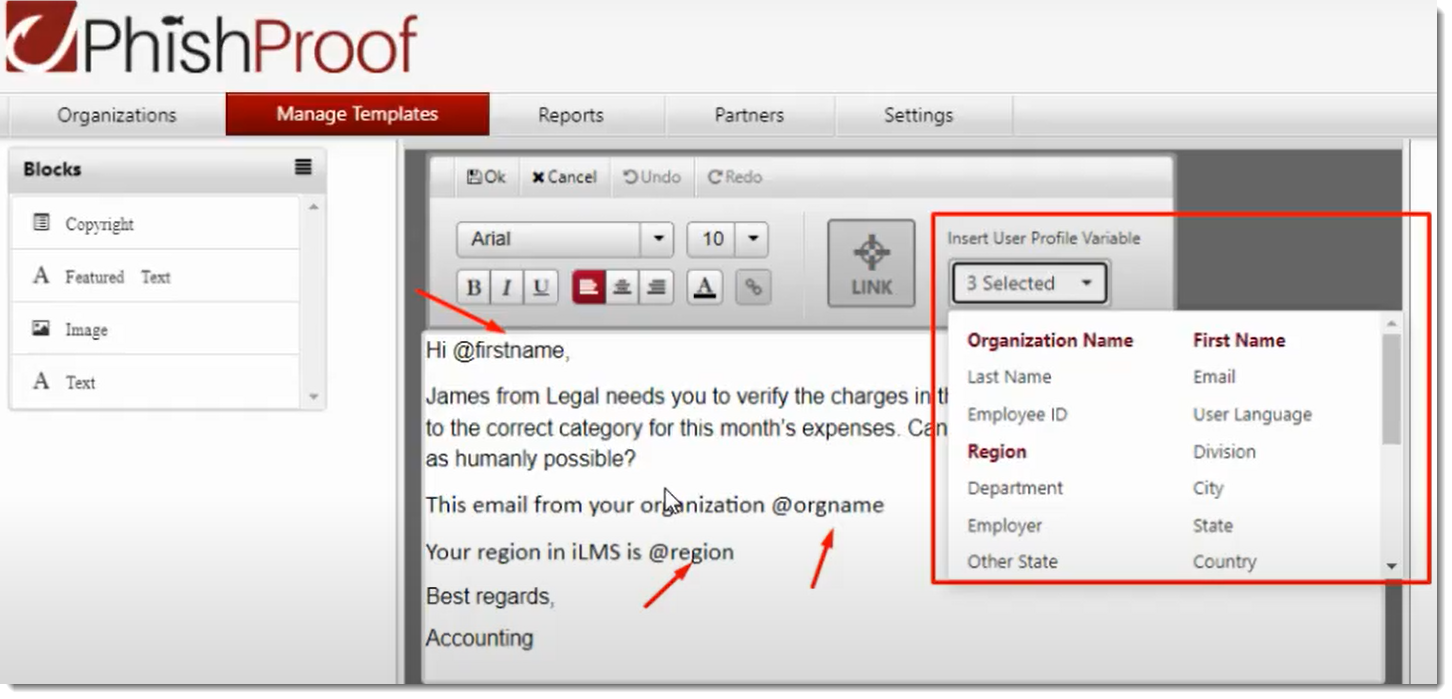
Shortcodes in Org Admin and Super Admin Templates
The Org Admin and Super Admin email template editors now have shortcodes available, including:
27 new user profile variables
iLMS console user variables (e.g., organization name, first name, email address, hire date, etc.) with the ability to include custom fields
Please note that while the Super Admin console shows all available variables, the Org Admin console only shows those added in iLMS.
Clone a System Email
Once you've identified a template you'd like to serve as a starting point for your custom template, hover over the template and the clone icon will appear.
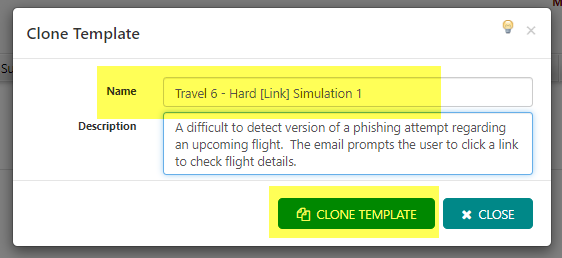
When you click the clone icon, the “Clone Template” dialogue will pop-up.
Here you can change the name of your custom template before clicking the Clone Template button.
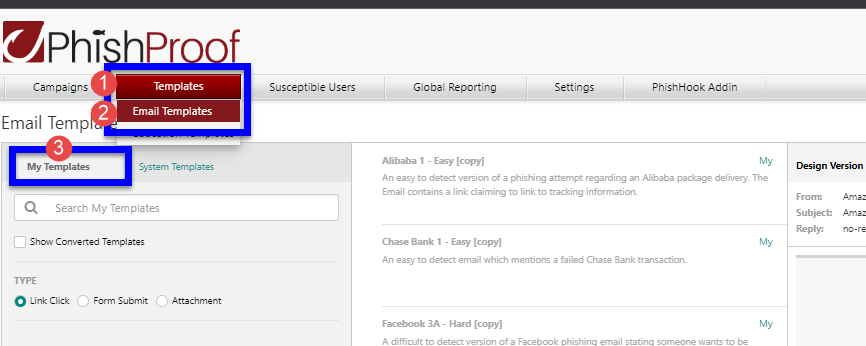
Once you have cloned a system template, it will now appear under the "My Templates" sub-tab.
You can navigate to the template type by choosing one from the “Show All Templates” dropdown list.
Edit the Cloned Template
- Find the template that you have cloned under the My Templates sub-tab.
- Hover over the template name to reveal the edit icon. Click on the Edit icon to modify the template.
This will open the “Customize Email Template page” where you can edit the header and email content for each available language option.

Edit the Email Template Header and Contents
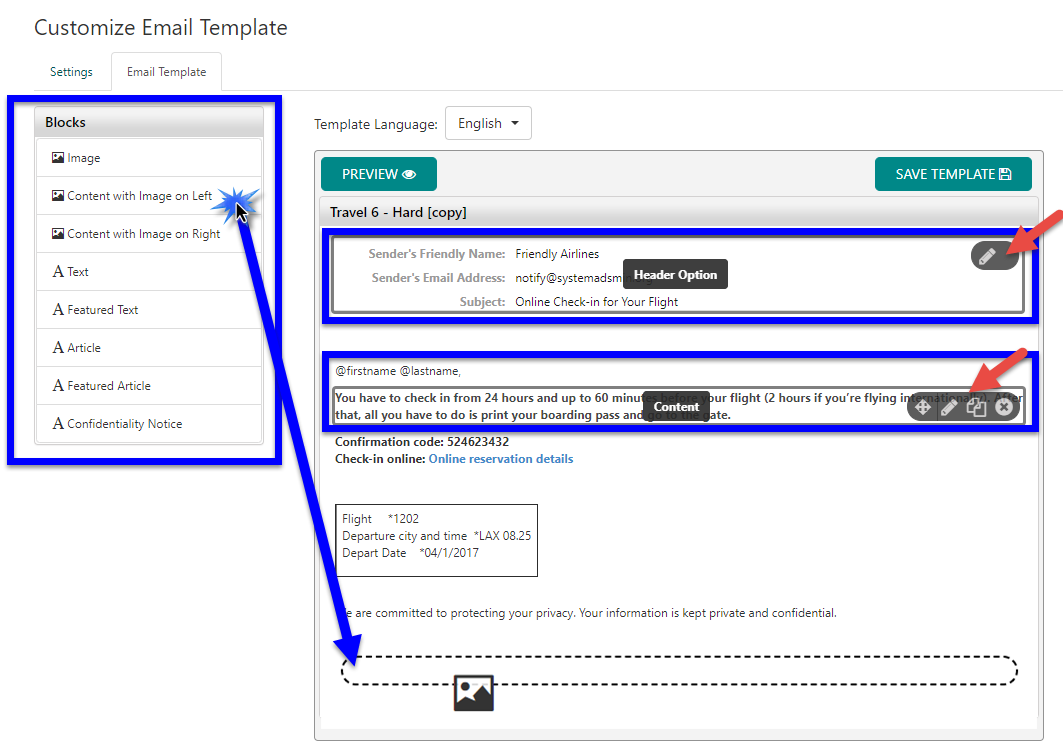
The PhishProof Editor offers the option to manipulate pre-designed content blocks or upload images through its embedded drag and drop function. The header information and sections of email content can be edited by hovering over the section and clicking the pencil icon that appears.
Additional content sections can be added to your email template by dragging items from the "Blocks" column shown on the left into the body of your email template.
Note: The editor does not support content that has been dragged and dropped into the template from external sources. Content must be added using existing building blocks and upload tools.
Templates containing unsupported content may fail to send.
Edit the Translated Versions
Most system templates have been translated into the languages listed under the Template Language dropdown. Select the language in which your users will receive phishing emails to edit the template in that language. You will have to do this for each language that your users use.
Once desired changes have been made to each email template, click Save Template to save changes.
To make your template available for use, return to the main My Templates page and click the toggle under the Active column to turn the template on.
Customize Education Landing Pages
Templates -> Education Templates -> System Education Page
Education Landing Pages are teaching components that will be displayed in correspondence to the type of phishing email selected. When a target user clicks on a “target link or attachment,” this educational page will open with a video that identifies the common notable phishing attack characteristics.
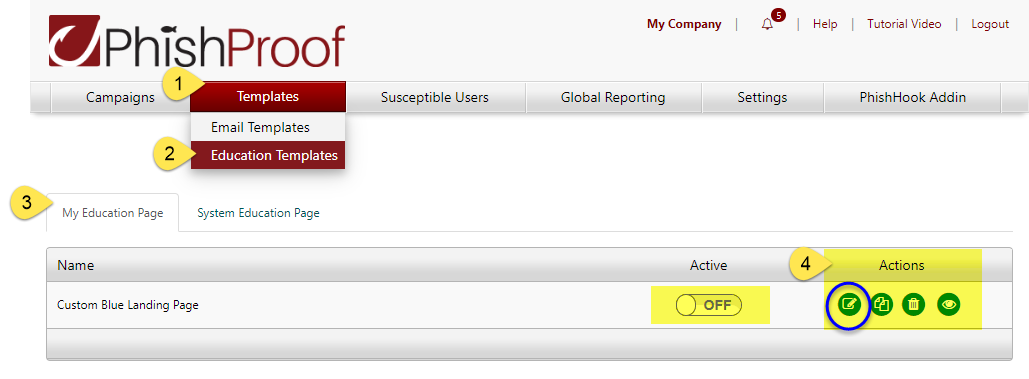
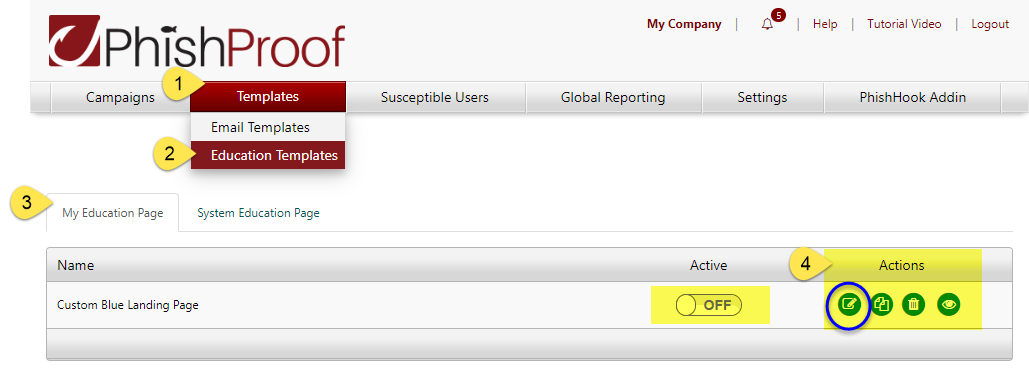
Navigate to the (1) Templates main tab and select (2) Education Templates. Once you have saved customized templates, they will be displayed in the My Education Page sub-tab.
To start, click on the (3) System Education Page sub-tab, choose a template, and click on the corresponding Clone icon under the Actions list. You can preview any template by clicking on the Preview icon under the Actions list.
Clone a System Education Landing Page Template
When you click the Clone icon, the “Clone Template” dialogue will pop-up. Don’t forget to change the template name before you click the Clone Template button.

Once you have cloned a system template, it will automatically show up under your My Templates subtab.
Edit the Cloned Template
- Under the My Education Page sub-tab, you will find the template that you have cloned.
For this example, we cloned the “Custom Blue Landing Page” template. - Click on the corresponding (4) Edit icon under the “Actions” list. This will open the “Customize Education Template page”.
Edit the Contents
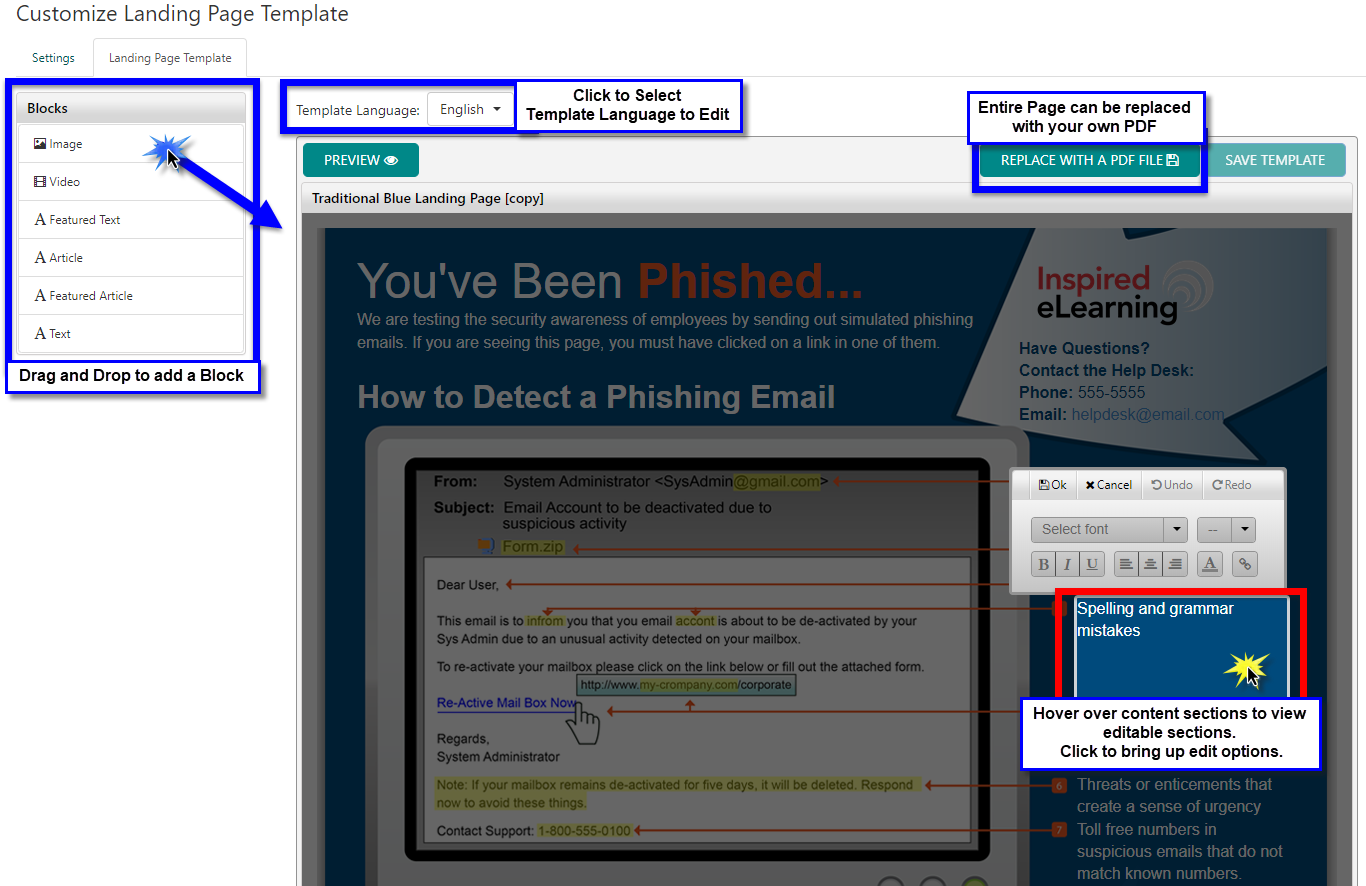
The Editor offers the option to manipulate pre-designed content blocks or upload images through its embedded drag and drop function. Content can be edited where a pencil icon is displayed.
Your logo and contact information should already appear in the education template. If you need to edit either of these for all templates going forward, please edit them using the main Settings tab in Phishproof.
You can also upload your own pdf version by clicking on the Replace with a PDF File button and following the instructions on the prompt.
Once desired changes have been made to the phishing email, click Save Template to save changes.
Edit the Translated Versions
Each template has been translated into the languages listed under the Template Language dropdown. Select the language in which your users will receive phishing emails to edit the template in that language. You will have to do this for each language that your users use.
You can also upload pdf versions in any language. Be sure the correct corresponding language is selected from the Template Language dropdown list before uploading a pdf.
Once desired changes have been made to each landing page template, click Save Template to save changes.
To make your template available for use, return to the main My Templates page and click the toggle under the Active column to turn the template on.
